Panning
Panning is a technique used in filming, it means when the camera follows something moving. This is useful for filming car chases, people running ect.
Tilt
The camera moves up or down on the same axis.
Zoom And Zoom Techniques
Zooming is when the camera focuses closely on an object or something else without moving the camera.
Wide Angle
The term wide angle in filming means, when the camera is filming a large landscape.
Wednesday, 19 January 2011

Logo Design: Fonts
Logo Designs: Fonts
Improved Design

This design now looked clean and colourful. I wanted to add something modern to my design using to font. I wanted my design to look modern so that the college looked up to date and appealed to new students.
 Apple Casual
This design didn’t look modern so I didn’t like it, I also felt that it would only appeal to the younger generation of students.
Bauhaus 93
 This design also didn’t work because it gave the feel of an Art and Design College, like the Bauhaus and because of this it didn’t appeal to all students.
ASO
I liked this idea, the font made it look modern, I also like the idea of the ‘g’ hanging below the banner because it looked stylish. The letter ‘B’ also helped to make the design look fresh and unique.
 Union City Blue
This idea looked too modern, it looked better if it was to suit a space museum or something else, so this didn’t feel right.

Bank Gothic
I still felt unhappy with my previous designs so I went for a completely different approach. I even changed the colour of the logotype to black because I felt yellow wasn’t neat enough.
I was pleased with this as it looked fresh and modern. I used two different sizes for the logotype, the word ‘ Burton’ was made bigger and bolder, while college was smaller but the spacing between the letters was greater so that the word together was the same length as ‘Burton’. This made the design look neater and more modern.
Wednesday, 12 January 2011
Camera Shots and Editing Practice

I used the camera, a tripod and iMovie to create a short video. I did this by first filming different shots outside the college. When taking shots I waited ten seconds after pressing play to leave time for the camera to steady and time for editing later. I also took about three takes for each shots so that i could use the best take when editing. Any piece of footage that I didn't need would be edited out later.
My first shot was a tilt shot from high to low, I zoomed in on this shot so that there was more detail on the sculpture. The term 'tilt shot' in filming means the camera moves up and down on the same axis without moving left or right. The term 'zoom' means the camera is focusing on something closer than normal without moving from the original spot the shot was taken. My next shot was a pan from right to left. The term 'pan shot' means that the camera is moving from left to right or right to left. I then practiced doing another tilt shot but this was from low to high. I finished with a pan shot from left to right. When I was filming I was careful about health and safety. I didn't film on the path so that the tripod wasn't a hazard to anybody walking past. Also I was careful that the area i was working on was level so that the camera didn't fall over or sink into the wet ground.
Once I had my footage I uploaded it to the computer and used iMovie to edit and put together what I had done.
I did this by importing the separate videos from the camera.

I then selected the piece of footage I wanted from each clip by highlighting the bit i wanted. I then dragged it into the video.
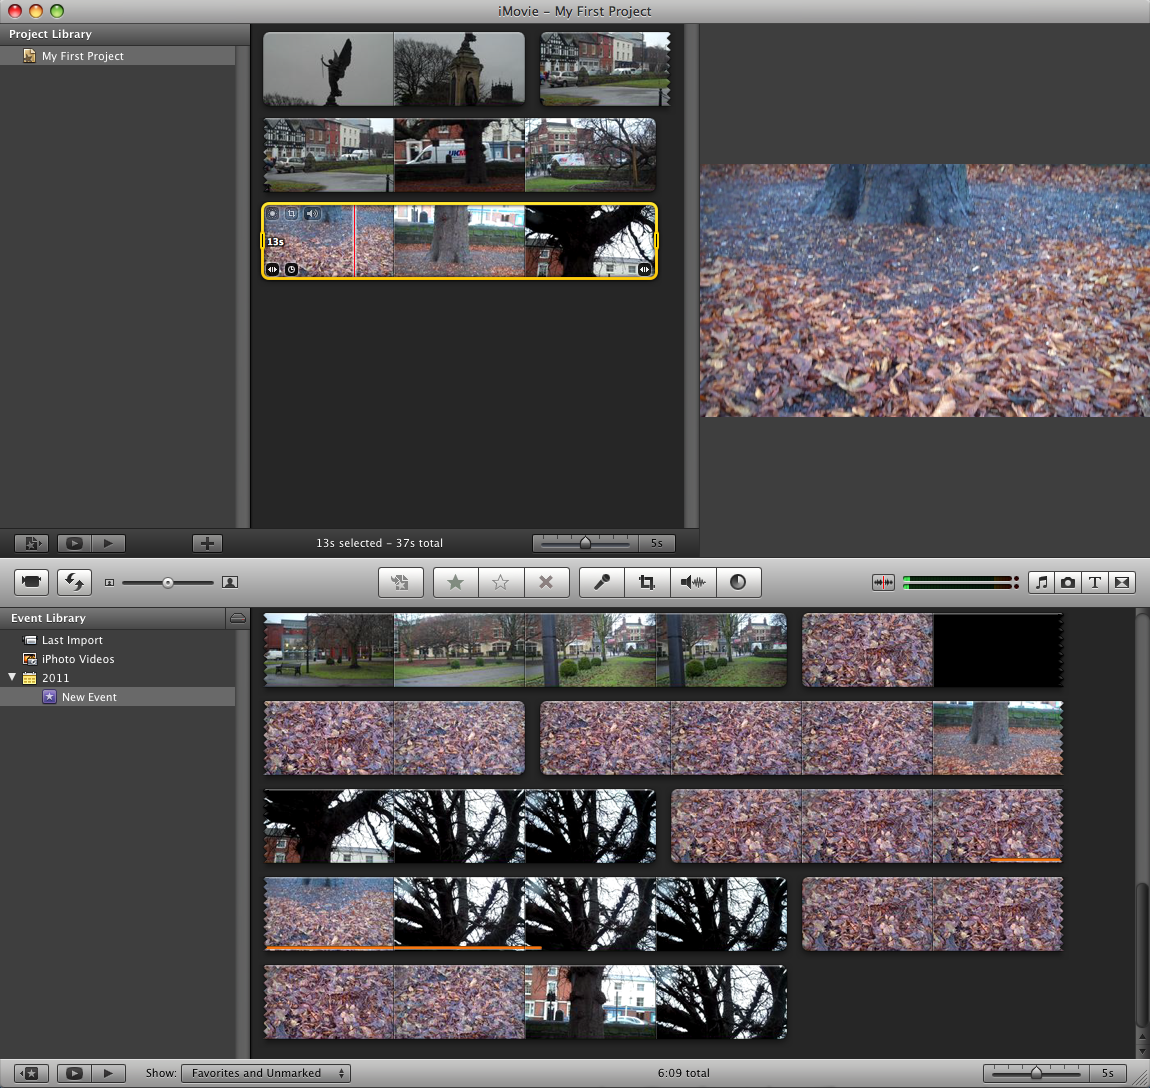

Once the video had been put together and I was happy with it, I then selected 'Share' and exported it as a QuickTime Movie. This then gives the option to change advanced settings such as sound quality and screen quality. These settings can be changed depending on whether the video is going to be higher quality or faster export. After changing these options to what I wanted I named it and then saved it.

Wednesday, 5 January 2011
Logo Design: Colour Scheme
Logo Designs: Colour Scheme
 Improved Design
I settled with this design because looked clean and, because of the banner, I could move on to create a design that was colourful and attractive. That was what I was going to experiment with next. However I was still unhappy with the design because it still didn’t look creative or modern, I would later improve this using the font and adding effects.
I took many wild attempts at making my designs look colourful. I used different schemes until I found one that worked by looking effective and colourful.

I started by adding a fill effect to the original colour scheme and changing the font colour to make it readable. I decided this looked too outrages and abandoned that idea. Next I created a unique and colourful design using a bright colour scheme. I quite liked this idea but I felt it would only appeal to female students. So I next decided to use colours that would appeal both male and female students. I came up with a blue scheme which I developed using a fill effect. I like this idea as it looked creative but instead of settling for one design I carried on developing my ides.

I decided to go with a new approach and make part of my logo transparent, this was an attempt to make my design look creative but I felt it didn’t work because the logo didn’t stand out enough and it wasn’t as colourful as I hoped. I decided that the green banner was a good idea so I used that and made the logo image stand out by making it colourful, using completely different colours than any shade of green. To make it more colourful, I added a fill effect t the banner, the effect was very subtle so that it didn’t look too outrageous like my previous idea.
Logo Design: Layout
For the band identity project I will be required to create a logo for the band so I decided to use one of my other designs for inspiration and help. I decided to design a logo for my college.


Logo Designs: Layout
I developed one of my original designs onto the computer using Adobe Illustrator. This was so I could change the layout and improve my design. I put no thought into the colour scheme or font at this stage because I was concentrating on the layout.
These are developed ideas from my initial designs from my graphic design sketch book.
These are developed ideas from my initial designs from my graphic design sketch book.
This was an improved design from my original idea. I payed more attention to the sculpture outside the college and used it in my design. Once I had this created on the computer I toggled around with the basic layout.
I first tried arranging the logotype and image. I wasn’t too sure whether I liked the whole sculpture in my design so I tried many ideas without it. I decided that it looked tidy without it.
I liked the idea of the image above the logotype so I further developed the design using a border around the text. I thought this improved the design, as it looked creative and unique. After experimenting with this idea I decided to create one that was more flexible and could be used over a greater range of applications as I couldn’t see this one working on student ID’s as it lost effectiveness when it was small.
I created a design that had a landscape layout, this was so it could be used on small applications and not take up much room while still being large enough to look effective. I preferred the layouts using the banner as this helped the design look clean while adding more colour.
Stop Motion Video
This is a stop motion video I helped to create and finish. As a graphics design student my role in this video was to create the ending credits. I created this using iMovie and Dafont.com, I used this site to find an appropriate font for the video. I created a list of the people involved in the video and their assigned role. Then I presented them as scrolling credits.
If i was to create credits again I would improve this by finding a more effective font and add a background to the credits page. I would also create an opening title screen.
By Alex Wood :)
Wednesday, 15 December 2010
Animation History
The History Of Animation
Early Animation
Animation has been around for a long time, early forms can be dated back to as far as still figures in motion drawings as cave paintings or even four thousand years ago when Egyptians used wall paintings to tell stories. Other forms of early animation existed on Asian vases.
Ancient Zoetrope – 180
Created in china by an Asian inventor, called Ting Huan, in 180 AD
 Modern Zoetrope – 1834

This device creates the image of a moving picture. It is made up using a cylinder with vertical slits on the outside of the device. On the inside are a series of images, these are opposite to the slits. As the device is spun the image appears to move. The zoetrope was commonly used for personal viewing rather than a group of people. It was only used to make a very short animation, usually a repetitive loop of a galloping horse or waltzing couple. A single person at one time, not useful for a large audience, could only view this.
A British mathematician called William George Horner created the zoetrope in 1834.
Flipbook – 1868
The official design of the flipbook was created in 1868. Flipbooks were the next step towards modern animation. Sequential pages flipped at a high speed create the illusion of motion. This is still used for viewing by a single person, not a whole audience.
Mutoscope – 1894
The mutoscope is a developed version of the flipbook, but instead it uses a crank handle.
Théâtre Optique – 1892
Charles-Emile Reynaud further developed the advancement of animation by creating a device that was a lot similar to the zoetrope but it allowed the moving image to be projected outwards and onto a screen. This meant that animation could now be presented to a large audience.
Modern Animation
Stop Motion Animation – 1898
Stop Motion Animation is the technique in which models and inanimate objects appear to move on screen. The illusion creates the motion of movement using photographs presented in sequence. The first use of stop motion animation was in 1898. It was called The Humpty Dumpty Circus and was created by Albert E. Smith and J. Stuart Blackton. Together these two created the concept of stop motion animation and it is still used today especially in clay animation.
Feature Length Films – 1917
Feature Length Films To Include Sound – 1931
CGI Computer-Generated Imagery – 1973

Subscribe to:
Posts (Atom)