Showing posts with label UNIT23 P3. Show all posts

Wednesday, 9 February 2011

Using Sony HDR FX1Camera


To film my second piece of video practice I used the Sony HDR FX1 Camera. This has many differences from the flip camera. The flip camera is small and easy to use, because of this, I prefer it. However it doesn't have as much capabilities as this camera. It can focus and unfocus, and also zooms in further. However because it is a much bigger camera it is heavy and harder to transport than the simple flip camera. I also had to consider the dangers of using a bigger and more expensive camera. I stayed inside the college because I didn't want to break it outside.

Wednesday, 2 February 2011

Final Cut Pro

Final cut pro can be use to edit an add sound to a video clip more professionally. This is because there is more control over the sound options than in iMovie


Adding A Soundtrack To Final Cut Pro
To import a soundtrack, drag the folder that the desired soundtrack is in onto the desktop, if not already. From here the folder can be dragged into the Browser tab. To put the soundtrack to a video, open the folder the music is in and drag the desired track onto the timeline.

Most kinds of soundtracks can be used in Final Cut Pro, they just need to be rendered. To render a soundtrack select, Sequence, Render Selection and then Audio.


Adding A Video To Final Cut Pro
Use a Quick Time Movie created and exported from iMovie and save it to the desktop. Drag the video into the viewer or canvas. The video then also appears in the timeline.

The video will more than likely have background sound that is unwanted. To get rid of this highlight the video by selecting it then click modify and select link. This unlinks the video and background sound. Highlight the background sound and press backspace to delete it.

Using The Razor Blade Tool
The razor blade tool is used to cut and crop the video. This is useful for further editing. The razor blade tool is found on the right hand tool bar. Select the razor blade and hover over the desired piece of video footage that needs to either be removed or moved to a new place in the video. 

Removing a piece of the video: Press the backspace on the unwanted piece of video.
Moving a piece of the video to rearrange it: Select the piece of video and drag it to a new place to change the order. This is useful for arranging video footage to fit to the beat of the sound track.

Wednesday, 19 January 2011

Video Techniques

Panning
Panning is a technique used in filming, it means when the camera follows something moving. This is useful for filming car chases, people running ect.
Tilt
The camera moves up or down on the same axis.
Zoom And Zoom Techniques
Zooming is when the camera focuses closely on an object or something else without moving the camera.
Wide Angle
The term wide angle in filming means, when the camera is filming a large landscape.

Wednesday, 12 January 2011

Camera Shots and Editing Practice

I used a Flip Video Camera to practice getting different shots. The Flip Video Camera is a small easy to use camera with zoom functions and high quality recordings. This camera can be used effectively on a tripod, taking good panning shots. However it isn't very useful for changing the focus length as it doesn't have this function.


I used the camera, a tripod and iMovie to create a short video. I did this by first filming different shots outside the college. When taking shots I waited ten seconds after pressing play to leave time for the camera to steady and time for editing later. I also took about three takes for each shots so that i could use the best take when editing. Any piece of footage that I didn't need would be edited out later. 
My first shot was a tilt shot from high to low, I zoomed in on this shot so that there was more detail on the sculpture. The term 'tilt shot' in filming means the camera moves up and down on the same axis without moving left or right. The term 'zoom' means the camera is focusing on something closer than normal without moving from the original spot the shot was taken. My next shot was a pan from right to left. The term 'pan shot' means that the camera is moving from left to right or right to left. I then practiced doing another tilt shot but this was from low to high. I finished with a pan shot from left to right. When I was filming I was careful about health and safety. I didn't film on the path so that the tripod wasn't a hazard to anybody walking past. Also I was careful that the area i was working on was level so that the camera didn't fall over or sink into the wet ground.


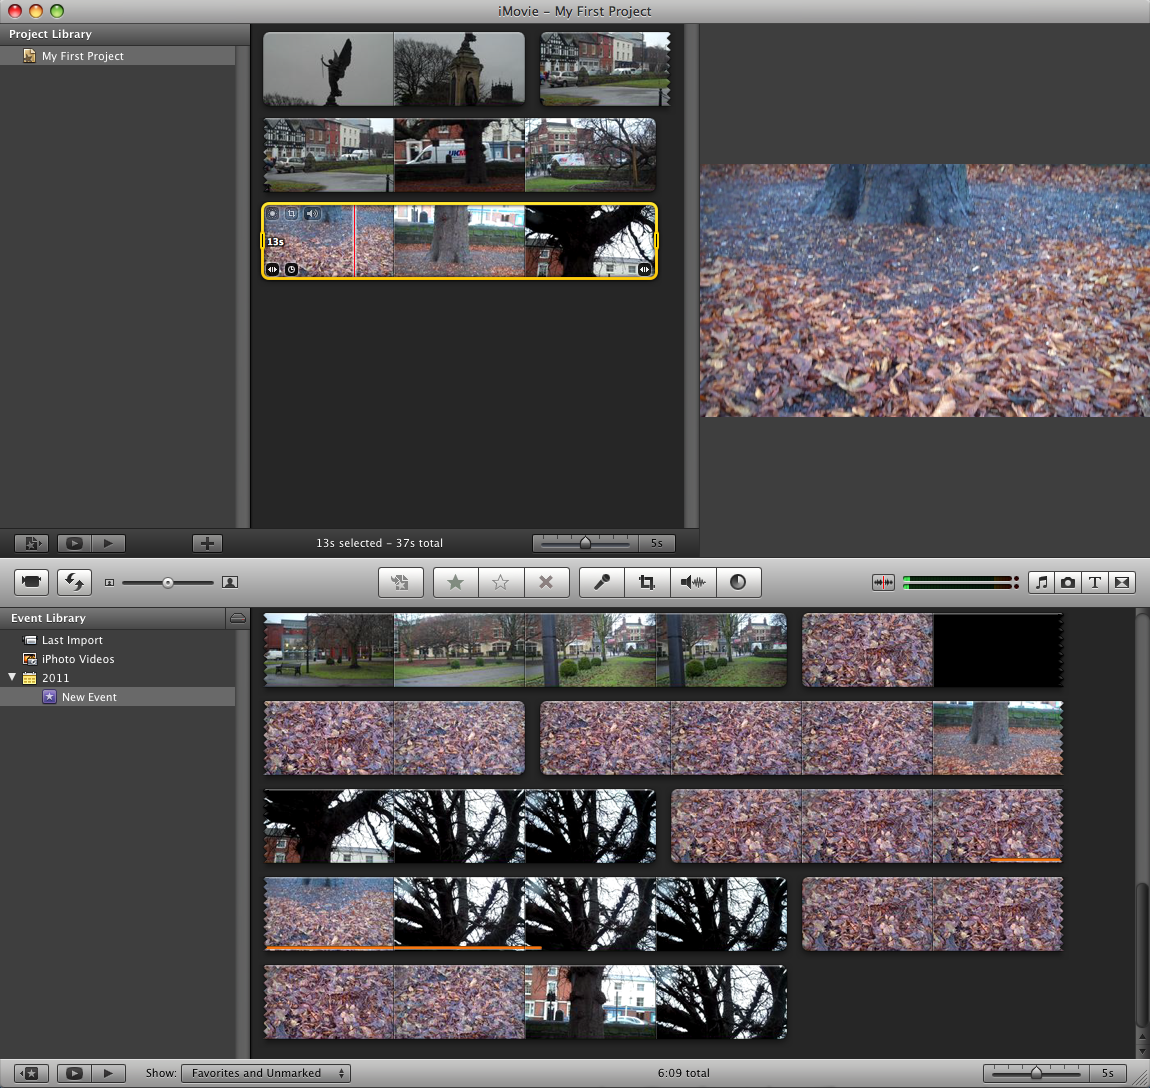
Once I had my footage I uploaded it to the computer and used iMovie to edit and put together what I had done.
I did this by importing the separate videos from the camera.


I then selected the piece of footage I wanted from each clip by highlighting the bit i wanted. I then dragged it into the video.


Once the video had been put together and I was happy with it, I then selected 'Share' and exported it as a QuickTime Movie. This then gives the option to change advanced settings such as sound quality and screen quality. These settings can be changed depending on whether the video is going to be higher quality or faster export. After changing these options to what I wanted I named it and then saved it.